


Introduction
Managing the DNS (Domain Name System) of your slot’s domain name is an important part of running a website. DNS determines where services such as email, mailer services, and search engine verification records point. This section explains how to manage your DNS depending on where it is hosted.
Scenario 1 — DNS Hosted with Hipposerve
If you are using Hipposerve’s nameservers (as discussed in the previous article), you can manage your DNS directly within the Reseller Portal.
- Go to your Reseller Hub.
- Click the Actions button next to the required hosting slot.

- Select DNS/MX Management from the menu.
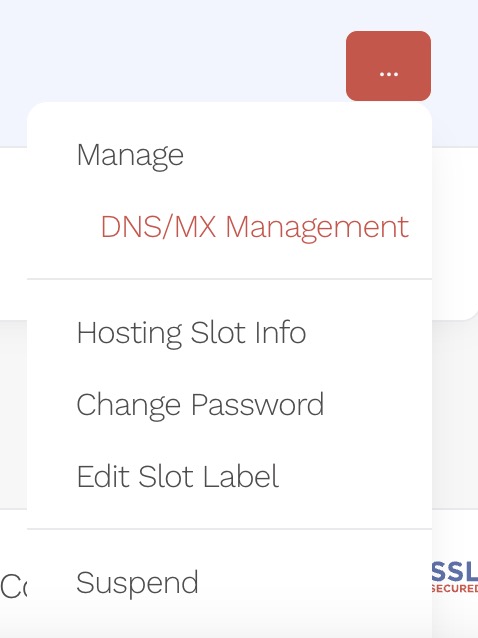
This will open the DNS records for the selected slot, where you can add, edit, or remove entries.
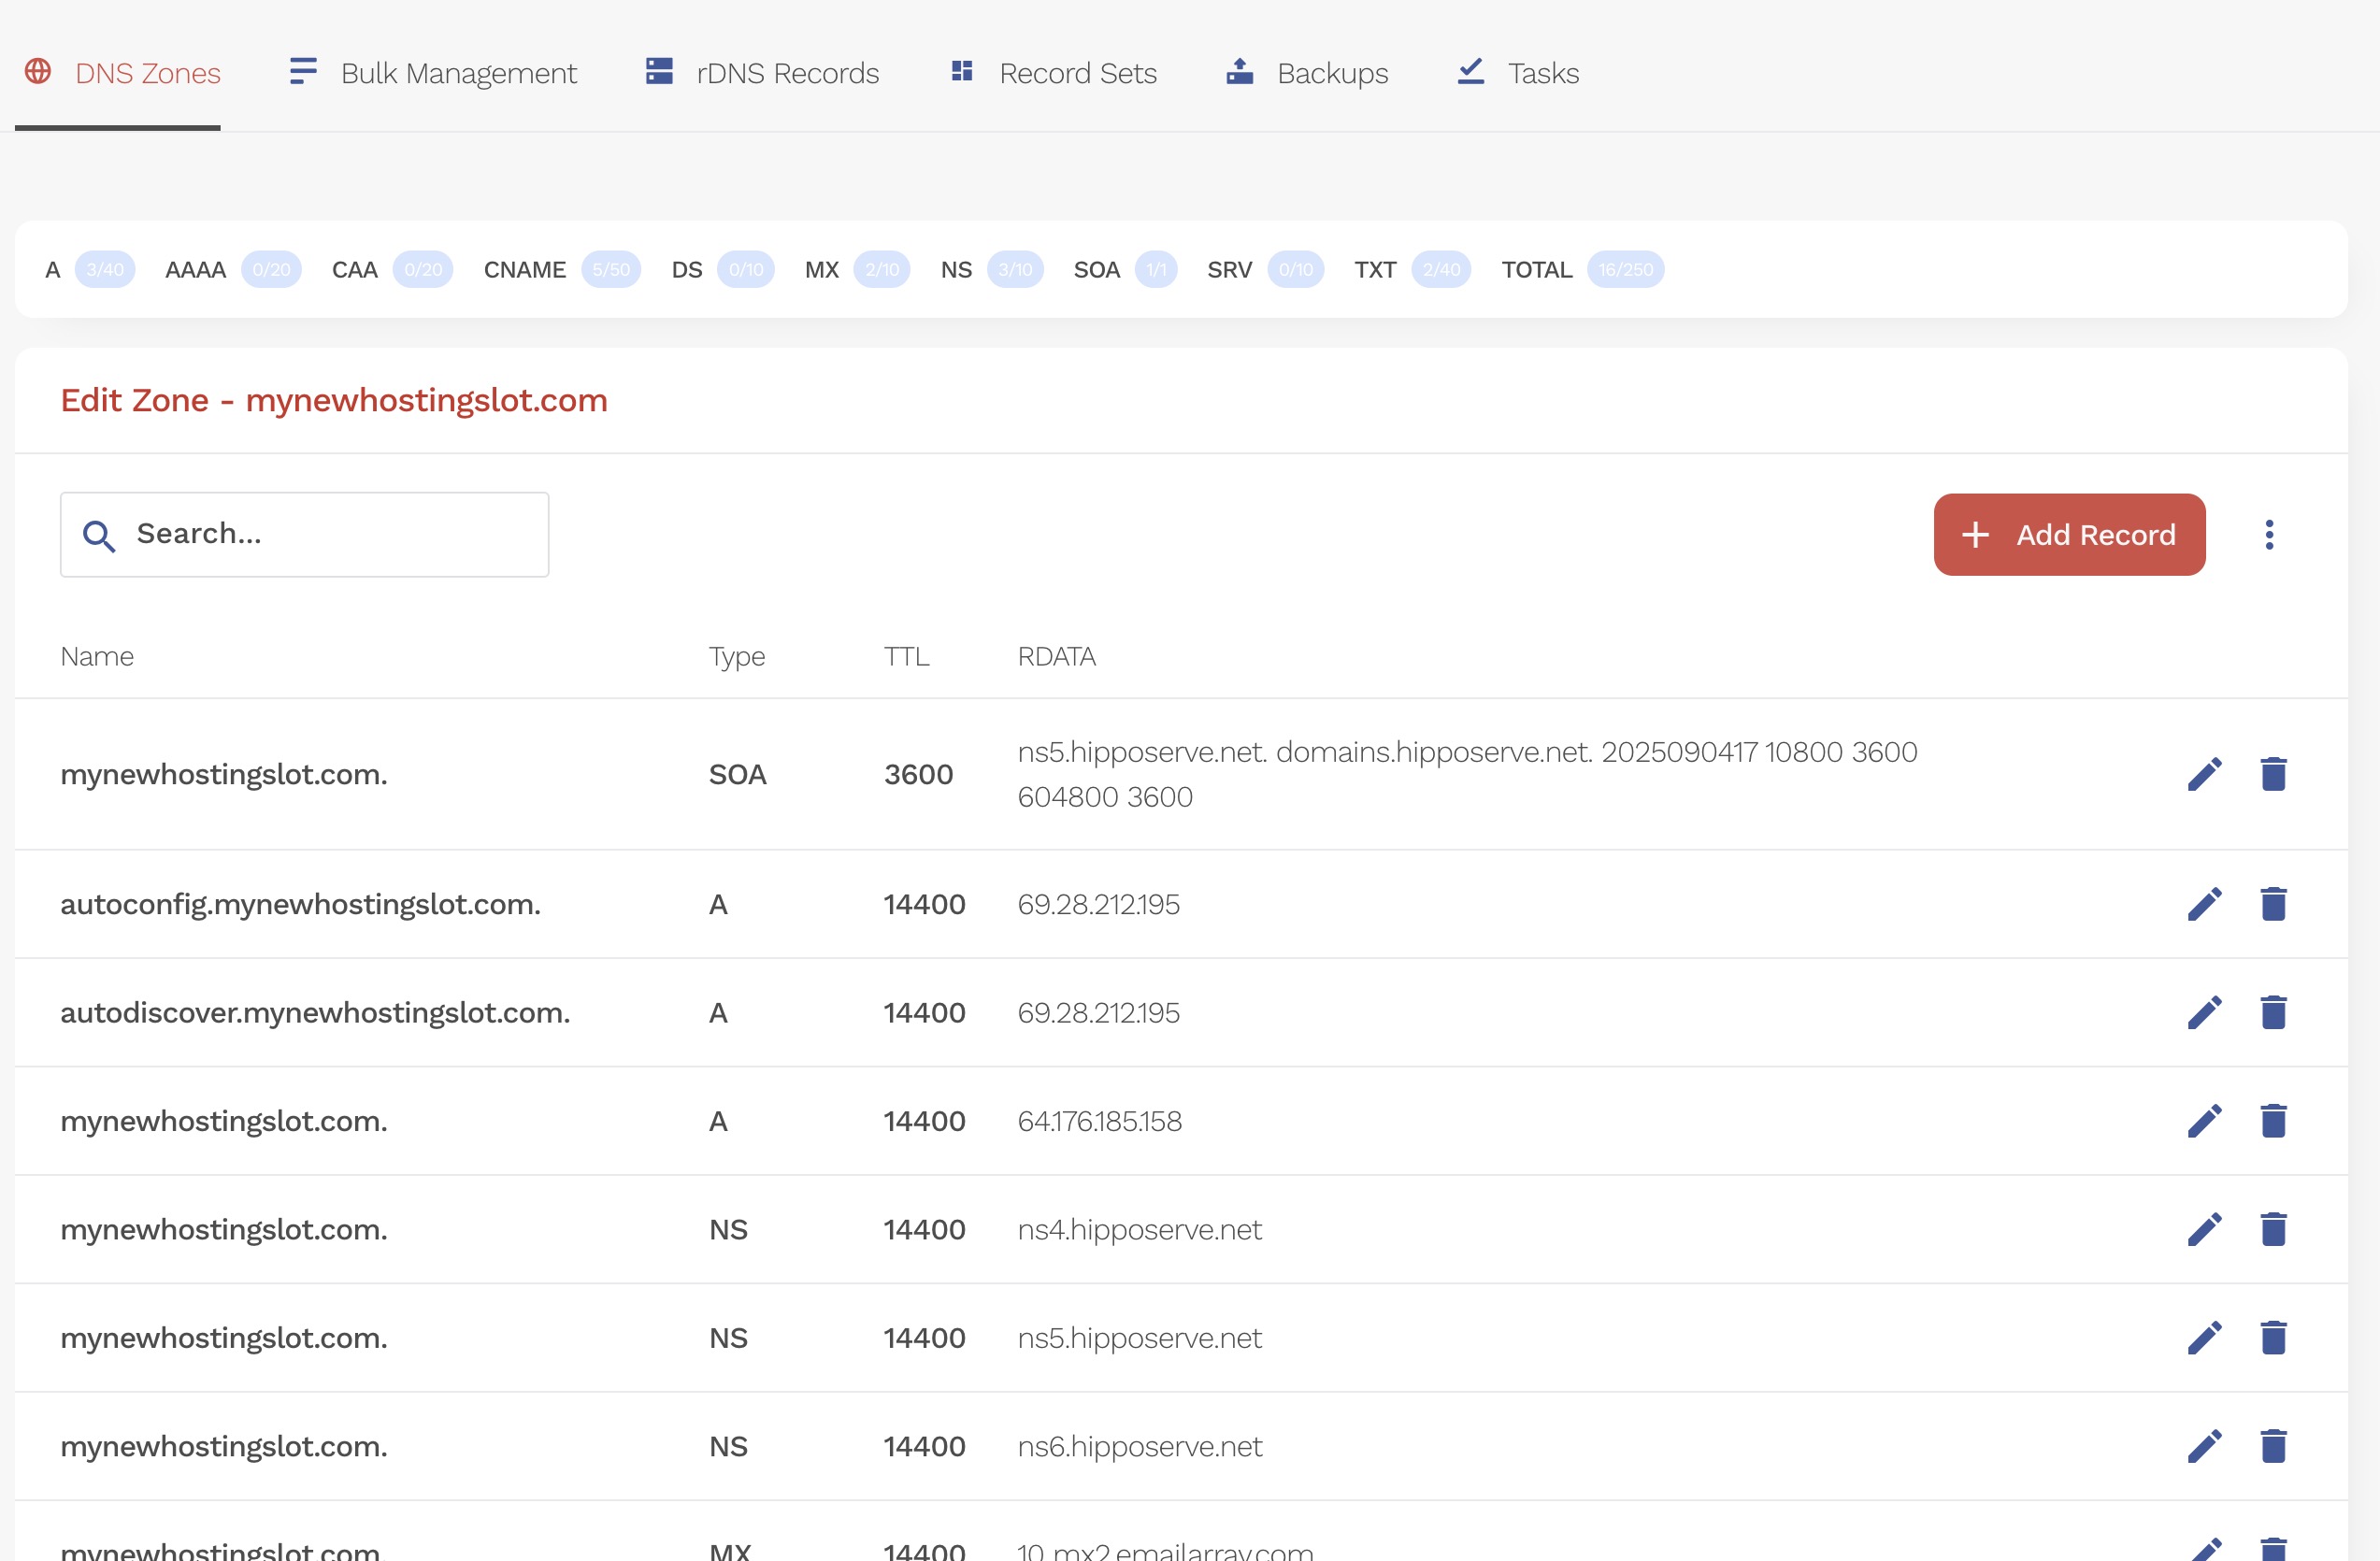
For a step-by-step guide to using the DNS management interface, see our DNS Management Guide.
Scenario 2 — DNS Hosted with a Third Party
If your DNS is hosted by a third-party provider (e.g., your domain registrar or another DNS service), you will need to manage your DNS records in their own interface. Each provider’s DNS control panel is slightly different, so please refer to their documentation for detailed instructions.


